My work flow is much more efficient as a result of LR. While Bridge allows you to rate images, Bridge does not allow for the very powerful editing features you find in LR. These same processes are in Photoshop RAW conversion. But because they are a part of the process for LR, the work flow process is much faster. I still use Photoshop, but only for intense editing involving layers and masks.
For those who may be unsure of the whole process, here is my nifty process from start to finish
IMPORT:
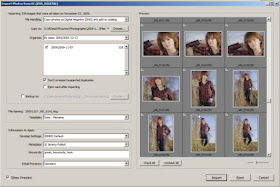
I pop in the CF disk into my desktop or laptop and hit the import button. On the opening screen I tell LR where to save the images, give the images a name, and add meta info.
Once the images are loaded I want to create a backup. I CTL -A to select all and export all the images to an external drive. I will make a 3rd backup of that drive as well.
 RATE THE IMAGES:
I then rate images on a simple 1,2,3 scale. I base the rating on sharpness, composition, and expression of subject. I must have all three to be considered a 1. The 2s are possible in at least 2 of my categories but I will need more review time with them. The 3s are just crap. They are usually not in focus or poorly composed. These are the ones that are beyond editing.
Using this system I can rate 500 + images in about 15 minutes.
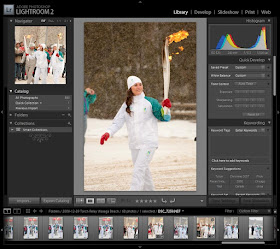
There are other methods of rating LR, but this is the simplest. Note we are still in the Library Module. At this point, I usually look back at the 3s before CTL - A and delete. I don't see any reason to keep the crappy ones. I'll then look through the 1s and rank them again. I use the SURVEY mode a lot. It allows me to look at images side by side. It makes picking out the differences between images easier. Finally I will do the 2s. This is where I decide if I am willing to save the image or not.

The rating page in Library Module.
 EDITING:
The fun starts in the Develop module. I won't go into any depth on my editing process as it varies from image to image. But I typically correct exposure and WB, crop, and tweak colors first. I love using curves here. From this point, the options are considerable. My advice is to play with all the settings. Because LR is essentially non destructive, at the end of your playtime, you can hit the reset button and it all goes back to the images original state.
 EXPORT:
When my images are edited, it is time to export. Under FILE, the export options are very simple. You have to tell LR where you want the edited images to go. So I save to a new folder, with the original names for the files, and export. On completion, I backup the edited images to 2 separate hard drives.
Give LR a try. It is far more intuitive than Photoshop and just as powerful.
